After setting up the initial AR Foundation project in Unity in part 1, we’re now adding the first basic augmented reality features to our project. How does AR Foundation ensure that your virtual 3D objects stay in place in the live camera view by moving them accordingly in Unity’s world space? AR Foundation uses the concept of trackables. For each AR feature you’d like to use, you will additionally add a corresponding trackable manager to your AR Session Origin.
Trackables
In general, a trackable in AR Foundation is anything that can be detected and tracked in the real world. This starts with basics like anchors, point clouds and planes. More advanced tracking even allows environmental probes for realistic reflection cube maps, face tracking, or even information about other participants in a collaborative AR session.

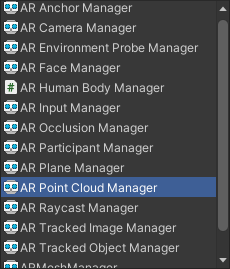
Each type of trackable has a corresponding manager class as part of the AR Foundation package that we added to our project.
Always add the required manager component to the AR Session Origin. The manager stores the information but doesn’t visualize it. You can toggle the feature by enabling / disabling the GameObject – this is important to do, as it maximizes the performance if you only have the managers active that you need at that point in time.
To interact with the trackable manager GameObject, your own code subscribes to events. It will then be informed about any changes.
All tracked objects must have an ARTrackable component attached – e.g., a tracked plane must have the ARPlane script, which is derived from ARTrackable.
Trackables: Point Cloud
Let’s start with tracking point clouds: interesting feature points, which the underlying AR subsystem detects and uses to infer other information like planes or anchors.
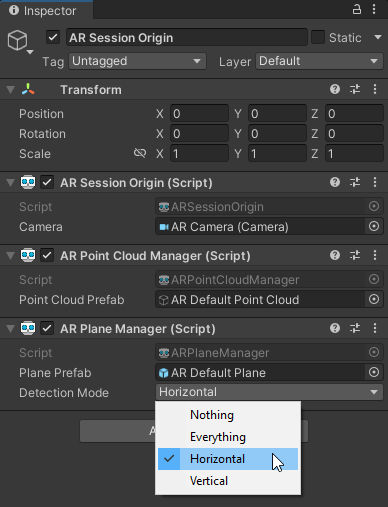
First, add the AR Default Point Cloud through right-clicking on the scene, in the GameObject > XR menu. Next, add the AR Point Cloud Manager script to the AR Session Origin component that you already have in your scene.
Finally, reference the new default point cloud object in the manager script parameters. This is not the ideal solution, but we’ll get back to the scene architecture later.
Please accept YouTube cookies to play this video. By accepting you will be accessing content from YouTube, a service provided by an external third party.
If you accept this notice, your choice will be saved and the page will refresh.
The feature points tracked through point clouds in AR Foundation contain the information in 3 parallel arrays:
- 3D position
- Unique identifier
- Confidence value (0..1)
AR Foundation decided not to bring in an own data structure that combines the information about each point in a single element. However, each array refers to the same point at the corresponding array position.
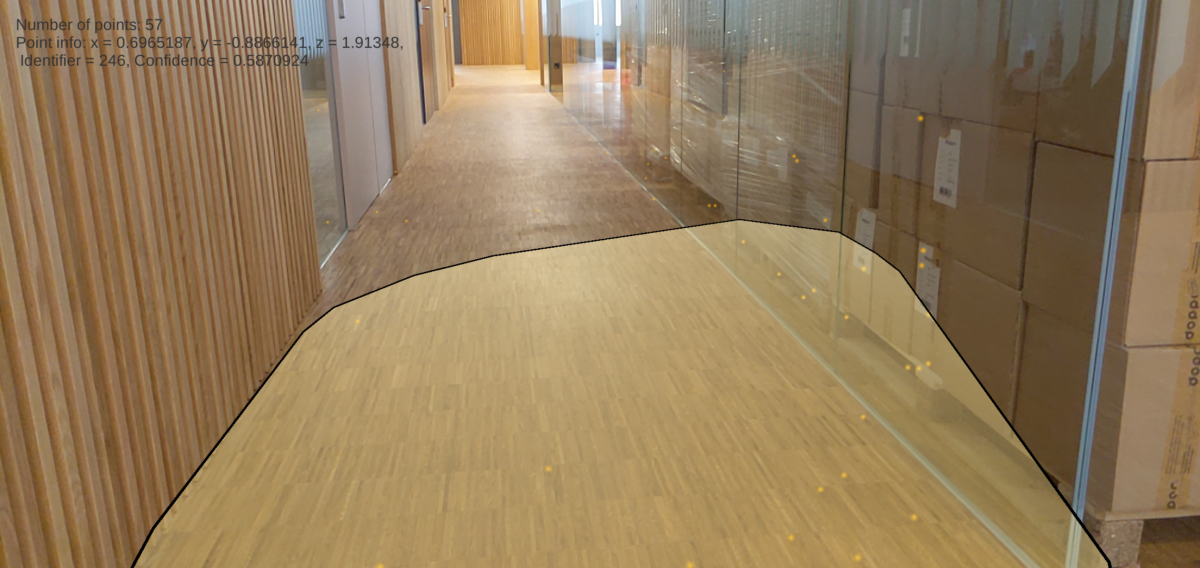
If you run the application on your smartphone, you should already see visualized points that the phone tracks. But let’s first further extend the app a little.
Access Point Cloud Info
As the next step, let’s view information about the point cloud. Through this example, we can see how to interact with the trackable manager class of AR Foundation.
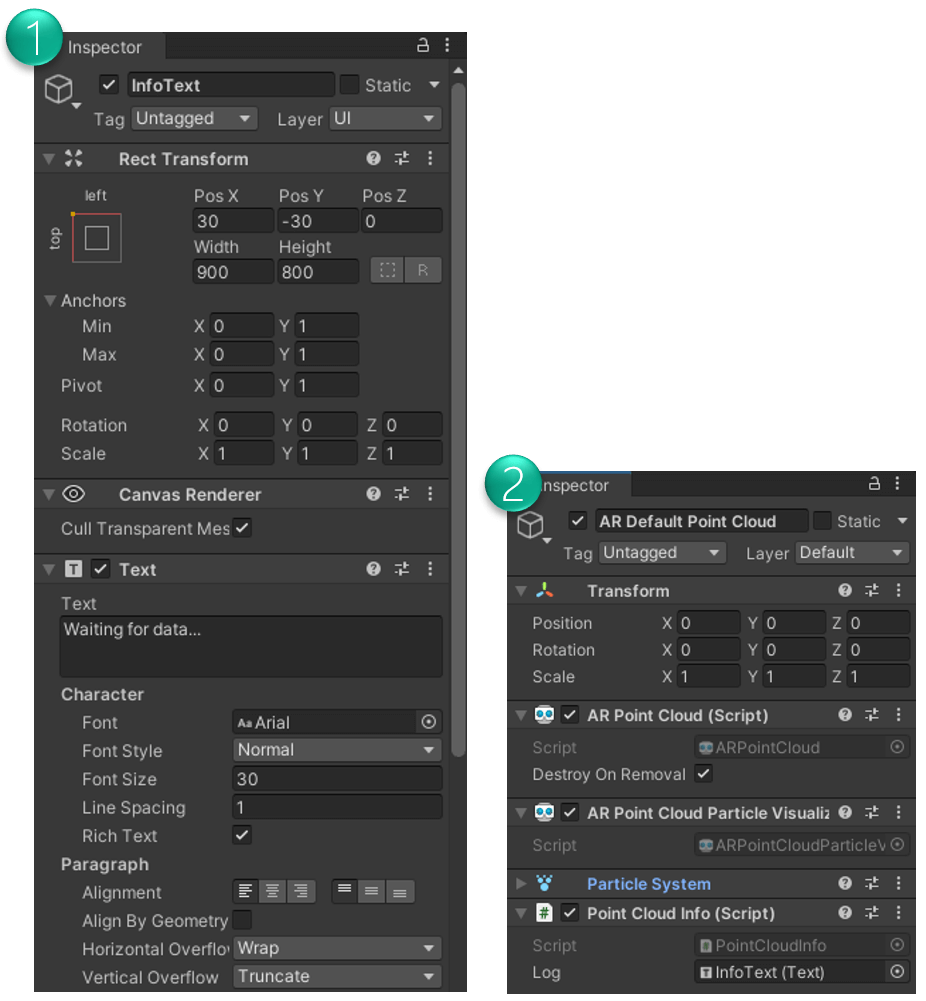
Some basic setup to show information on the screen:
- Create a screen space
Canvasin your scene that contains aTextUI element. Configure it according to the screenshot below. - Add a new
PointCloudInfoC# script and attach it to theAR Default Point CloudGameObject in your scene, which contains theAR Point Cloudtrackable script (as well as a script to visualize the point cloud through a particle system).

Next, add the following code to our new Point Cloud Info script:
The script retrieves the ARPointCloud script that AR Foundation automatically attached to the AR Default Point Cloud GameObject. It then subscribes to its updated event, so that we can react to any changes in the point cloud in our own OnPointCloudChanged method.
In that method, we access the three info arrays that AR Foundation provides: positions, identifiers and confidenceValues. Our script then prints the number of points that are currently active, as well as the information about the first point in all three arrays.
Please accept YouTube cookies to play this video. By accepting you will be accessing content from YouTube, a service provided by an external third party.
If you accept this notice, your choice will be saved and the page will refresh.
Some architecture notes: this solution is not perfect. The point cloud manager script creates a new instance of the assigned “prefab” when it starts tracking the point cloud. So, we should not have the “prefab” object in the scene already, to avoid it being instantiated twice. However, this would need a bit of custom code to find the reference to a scene-wide logger class from the prefab instance, and our first working sample should be as easy as possible.
Planes
After visualizing tracked feature points through the point cloud, let’s further connect the real and the virtual world. One of the fundamental trackables that almost all AR apps use are planes. You usually place your holograms on horizontal surfaces detected in the real world. A plane is stable to track, directly corresponds to a major physical structure in the real world, and usually provides a bigger physical area than a single feature point as reference.
To visualize planes, apply similar steps as before:
- Right-click on the scene > GameObject > XR > Add AR Default Plane
- In
ARSessionOrigin: add theARPlaneManagerscript
This time let’s use a prefab (as pointed out before). Drag and drop the AR Default Plane GameObject from your scene hierarchy to your assets window, so that its icon turns blue. You can now delete the GameObject from your scene. Once this is done, assign the prefab from the assets to the ARPlaneManager script. The prefab will now be created on-the-fly during runtime by the manager when it detects the first plane.

In the detection mode, you can select which kinds of planes you want to detect. For example, if you only need horizontal planes to place objects on the floor, it increases performance and stability to disable vertical plane detection.
Coming Next: Raycasts and Anchors
After visualizing point clouds and planes, the next step is to start placing own 3D objects into the real world. We’ll do that through single or persistent raycasts. AR Foundation also offers two types of anchors: we’ll explore both generic as well as plane attached anchors.
AR Foundation Article Series
A hands-on tutorial which guides you through your first AR Foundation app. Start with a new Unity 3D project. Understand its architecture with trackables and managers. Use Plane and Point Cloud detection. Perform raycasts and create anchors in the real world or on planes. Plus: place 3D models on printed 2D images that your app tracks in the real world.
