Shadows are immensly important for the perception of Augmented Reality scenes. If the holographic 3D object that is placed in the real world has a shadow, it fits better to the world, and users have a better understanding of its placement in the world. This is the result of the study I’ve done some time ago, detailled in the blog posts: Part 1, Part 2, Part 3. How to apply this to Microsoft HoloLens? Negative Shadows are the answer.
HoloLens and Holographic Shadows?
For the HoloLens, rendering shadows is special. The HoloLens displays are light-based – as such, they can add light to a real-world scene. However, they cannot reduce light or darken parts of the real world. If you add a traditional dark shadow to a scene, it simply won’t be visible in the HoloLens.
Therefore, there are two possible shadow approaches:
- Create a holographic surface beneath the hologram: instead of directly placing your holograms on a real-world object, also render a plane as the surface beneath it. In case of objects placed on the ground, you can render a virtual floor, e.g., made out of a wood texture. The floor plane can then of course have a normal texture with darker and lighter parts, thus convey shadows. However, in many cases it’s not desired to place a planar surface beneath all your holograms, as that obviously covers the real world surface.
- Create a “negative shadow”: add a soft glow on the floor surface around the object, that adds light around the object and thus makes the actual shadow area appear darker than its surroundings.
Negative Shadows
The approach of negative shadows is briefly described in the Designing for mixed reality document from Microsoft:
Many designers have found that they can even more believably integrate holograms by creating a “negative shadow” on the surface that the hologram is sitting on. They do this by creating a soft glow on the ground around the hologram and then subtracting the “shadow” from the glow. The soft glow integrates with the light from the real world and the shadow grounds the hologram in the environment.
But how to create this effect in Unity? I did not find a tutorial or any further instructions, so I decided to give it a try myself and created this quick approach for simple holographic shadows.
Shadow Casting & Texture
Of course, there are many approaches for calculating shadow in Unity (e.g., the Projector). Real-time calculations are tricky to do due to the limited resources of HoloLens. Therefore, pre-calculated shadow maps are usually the way to go.
In my case, I just did a screenshot of the scene as seen from the top, and then recreated the approximate form in Photoshop.
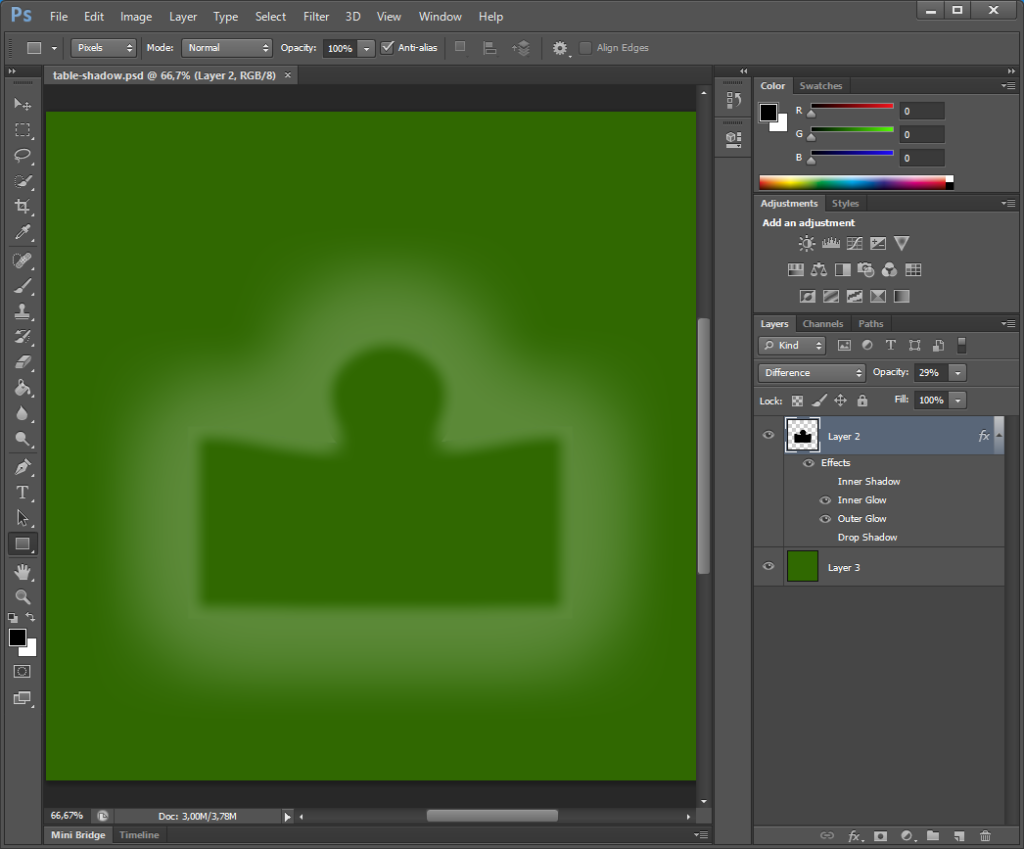
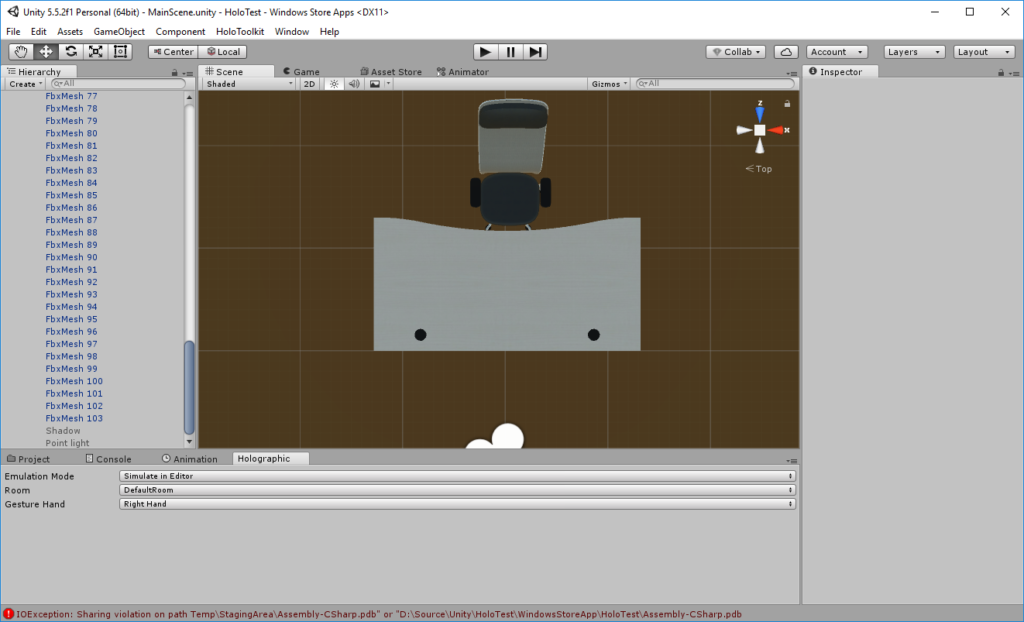 Essentially, you just need a solid-colored, black object in Photoshop that has the approximate form of the shadow you desire. Next, add a glow to this object – a larger, slowly fading outside glow that makes the light effect less noticable to the user, as well as a small glow to the inside.
The resulting negative shadow texture (temporarily placed on a green background for better visibility) looks like this:
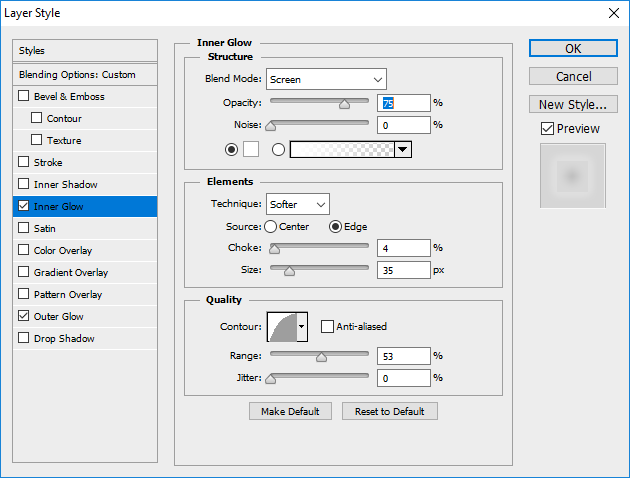
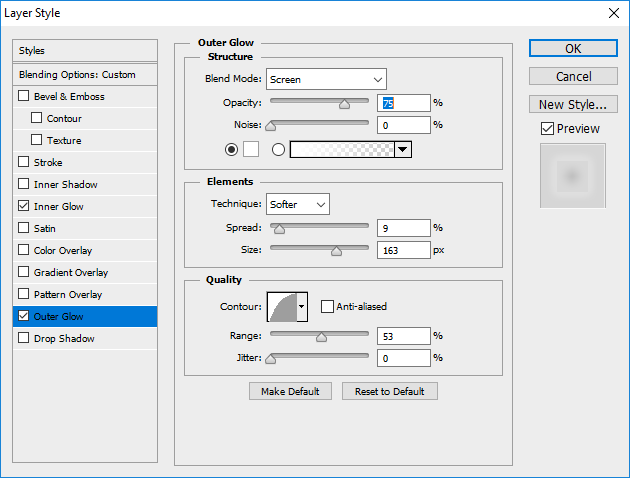
I’ve found the following settings for the inner and outer glow a good compromise. I’ve set the object’s blending mode to “difference”, as I didn’t want the object itself to show its edges in the glow. For the glow, I’ve used a white color, and adapted the contours to have a quicker fall-off.
Adding the Negative Shadow to Unity
I’ve then added the texture on a sprite and placed it below the object that should cast the shadow. In the sprite color, you can adjust the transparency of the shadow.
How bright the shadow should be depends on the lightning situation. In general, it should be brighter than what looks good in the Unity editor to appear as desired on the HoloLens. Screenshots of holograms taken directly in HoloLens are also darker than they look in the live HoloLens; therefore you might need to increase the brightness of the shadow even more if you want to record the scene.
Demo Pictures of Negative Shadows
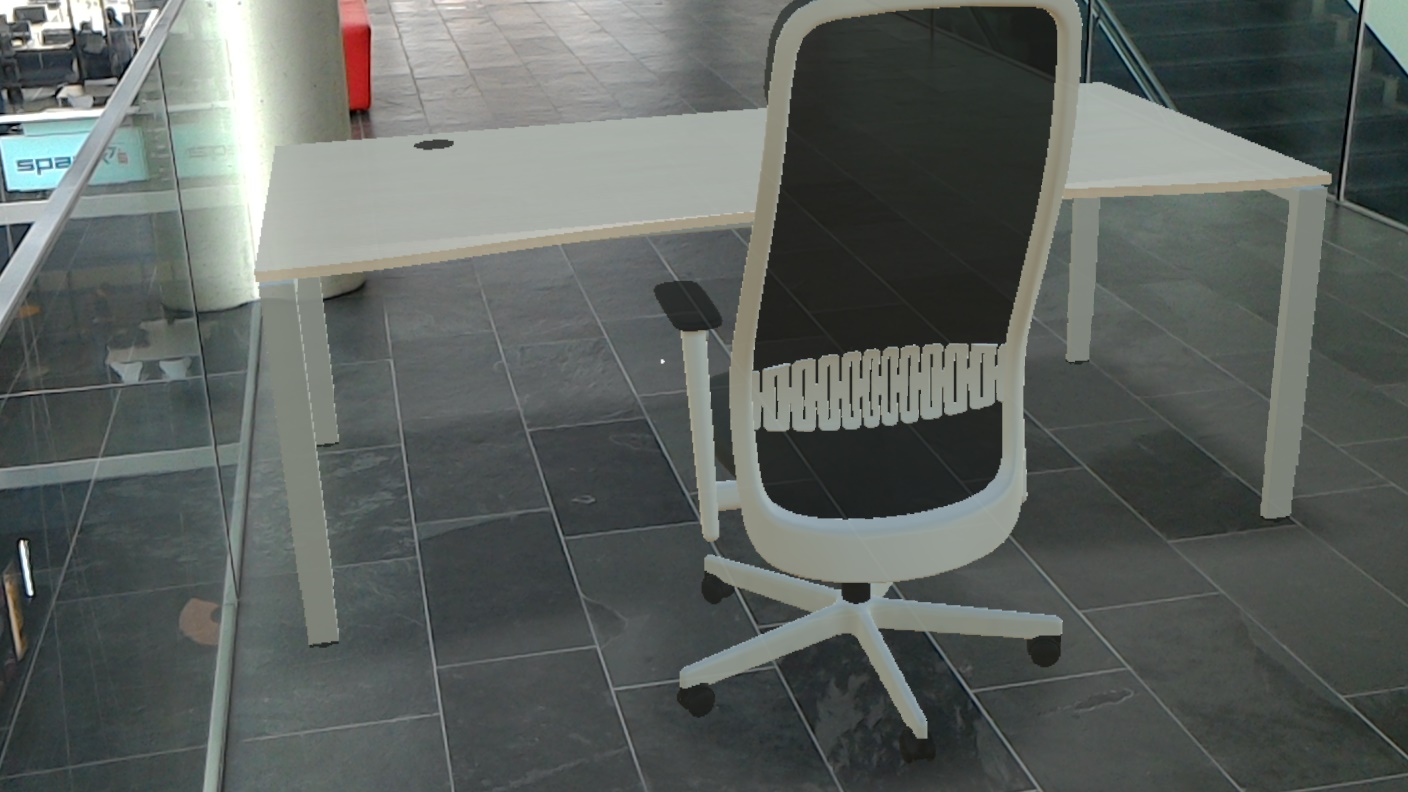
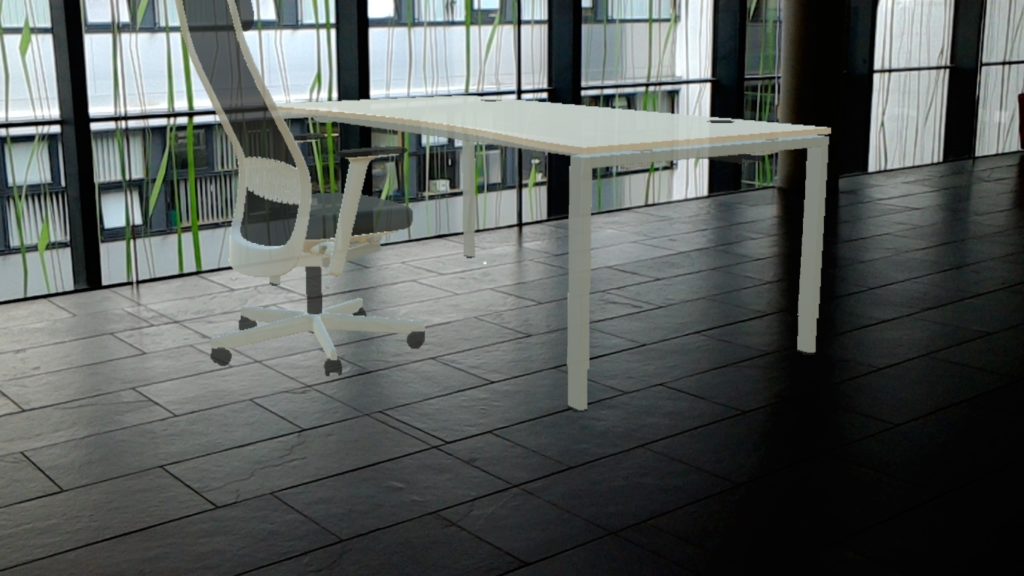
First, the scene of the holograms without a negative shadow. The table and the chair do not appear to be properly grounded on the floor and look like they’re floating and don’t belong to the scene:
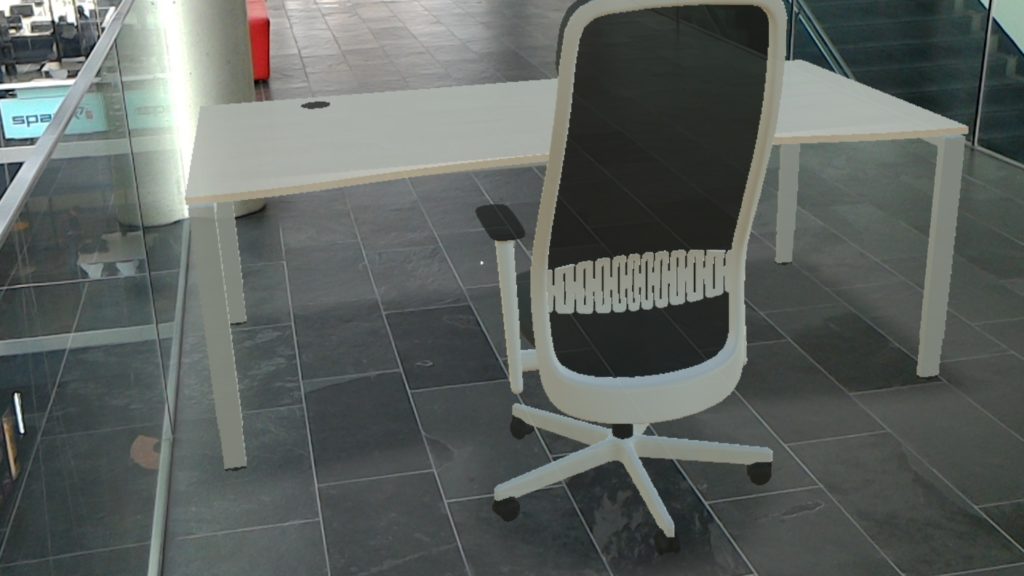
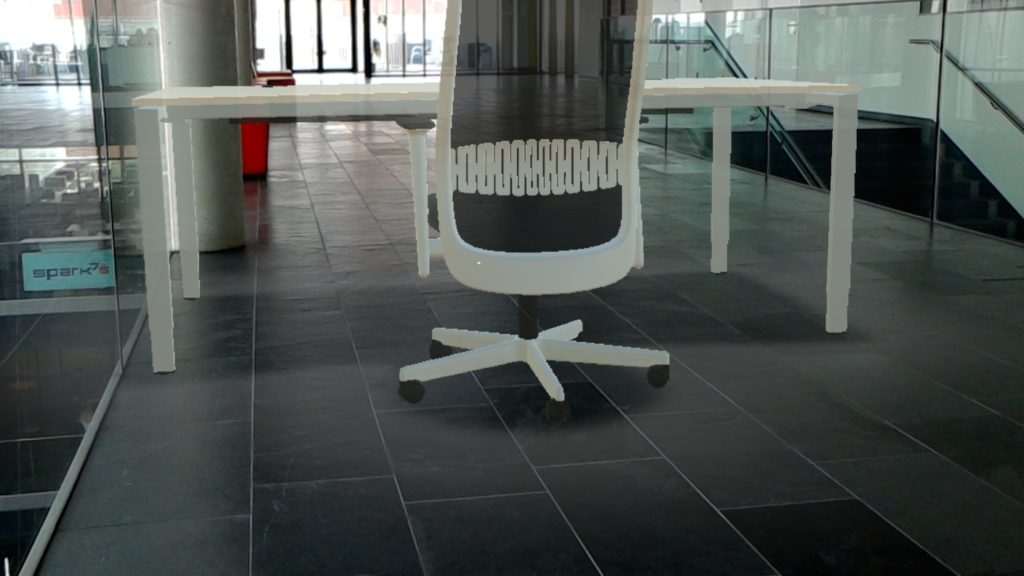
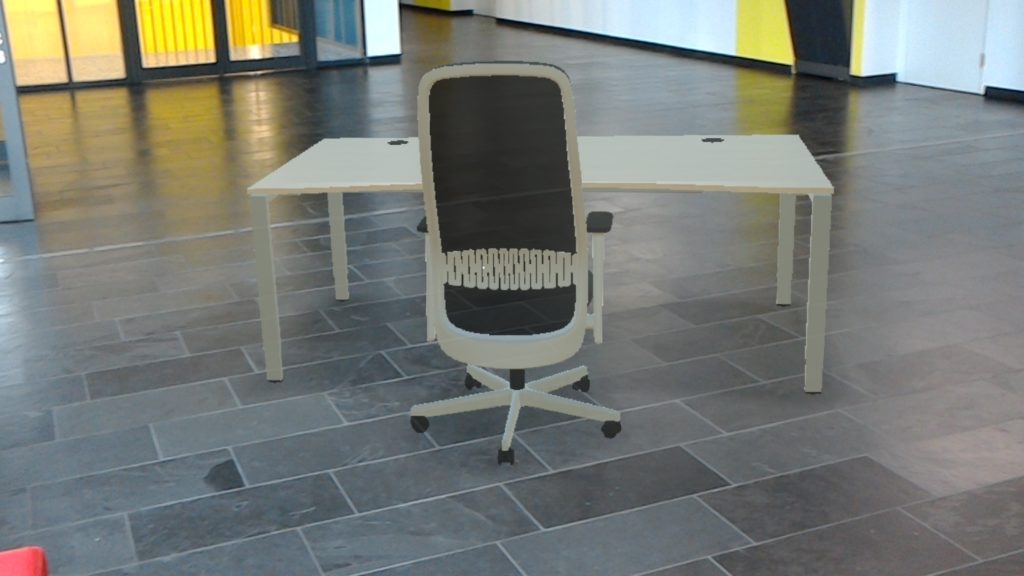
Here some examples of how the hologram looks when placed in the real world, with a negative shadow applied. If the transparency is set to a good level that fits to the environment, you hardly notice the glow, but can clearly distinguish the shadow beneath the table and the chair.
Credits: thanks to Bene for the 3D model fo the table and chair!
Shadow in AR & HoloLens blog series:
