How to make real-time HDR lighting and reflections possible on a smartphone? Based on the unique properties of human perception and the challenges of capturing the world’s state and applying it to virtual objects. Is it still possible?
Google found an interesting approach, which is based on using Artificial Intelligence to fill the missing gaps. In this article, we’ll take a look at how ARCore handles this. The practical implementation of this research is available in the ARCore SDK for Unity. Based on this, a short hands-on guide demonstrates how to create a sphere that reflects the real world – even though the smartphone only captures a fraction of it.
Google ARCore Approach to Environmental HDR Lighting
To still make environmental HDR lighting possible in real-time on smartphones, Google uses an innovative approach, which they also published as a scientific paper . Here, I’ll give you a short, high-level overview of their approach:
First, Google captured a massive amount of training data. The video feed of the smartphone camera captured both the environment, as well as three different spheres. The setup is shown in the image below.
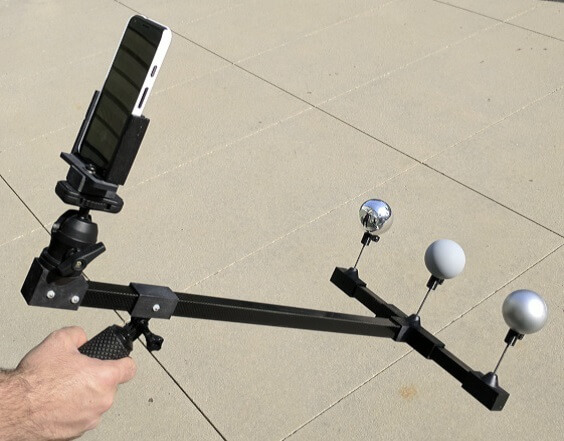
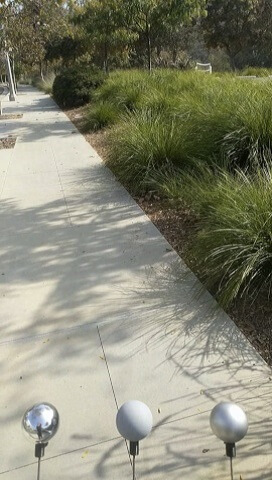
Instead of using multiple camera exposure times, the different material properties of the three spheres enable capturing multiple characteristics of lighting:
- Mirrored silver: omni-directional + high-frequency lighting but saturates with single exposure.
- Matte silver: rough specular lighting.
- Diffuse gray: blurred, low-frequency lightning. Estimate of total light & general directionality.
Neural Networks & Deep Learning for Reflections
Based on a huge amount of captured data, they try to infer the ground truth – the content of the three spheres – based only on the image data visible above in the same smartphone camera image.
The neural network structure is based on a well-known Convolutional Neural Network (Mobile Net v2), extended with a decoder to generate the sphere images. The network loss function to minimize is the difference between the computer-generated sphere images and the captured sphere images.

Results
What do the results look like? I’ve labeled a sample image shown in the original paper by LeGendre et al. .
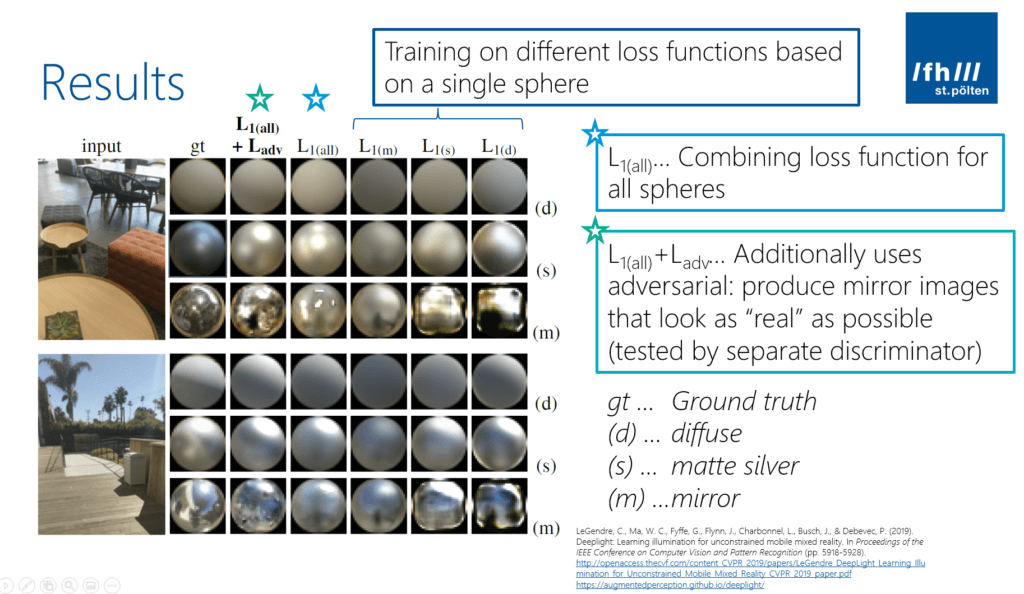
As you can see, there are some differences for the three spheres (labeled: d, s, m) when comparing the ground truth (captured images from the real spheres; gt) with the artificial images (L1(all) + Ladv). But generally, the difference isn’t too big.
Especially the light direction is usually estimated very close to the real-world lighting. Reflections are a bit off. However, as we’ve seen previously, humans are not too good at recognizing slight deviations from the ground truth when it comes to reflections.
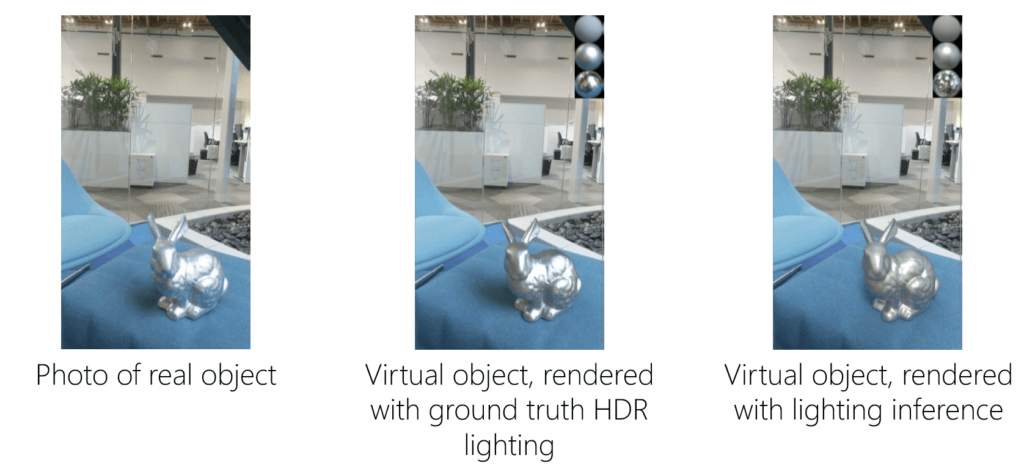
If you don’t believe it, look at the following example.
- The left image is a real model of a rabbit with a shiny surface.
- The middle image shows a virtual object but rendered based on the ground truth HDR capture.
- The right image is showing the same virtual object but used the lighting inference based on the neural network.
Even though a difference is clearly visible, also the image based on lighting inference fits in well to the natural scene.
Environmental HDR & Reflections in Unity
Let’s look at how to render a reflective sphere using ARCore with Unity. To do so, we’ll modify the scene based on the HelloAR example.
First, ensure that the EnvironmentalLight prefab is part of your scene. Its script queries the Frame.LightEstimate.
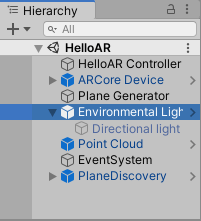
Based on this, it updates the global shader variables (for ambient lighting mode) or the render settings (for the HDR mode, which we’re using). In addition, the prefab contains a directional light, which is also updated to match the global lighting estimate:
Visualize Reflection Map
As the next step, let’s visualize the reflection map generated by ARCore. First, create a new material and call it Reflective. Use the Standard shader (note: the ARCore/DiffuseWithLightEstimation and ARCore/SpecularWithLightEstimation shaders only work with “ambient intensity” mode, not with “Environmental HDR” mode!). Set Metallic & Smoothness to 1. Ensure that Reflections is set to On.
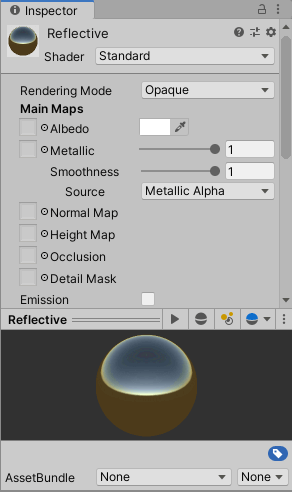
Next, create an empty GameObject in your scene, and call it ReflectiveSphere. As its child, create a new 3D sphere. Then assign our Reflective material to the sphere.
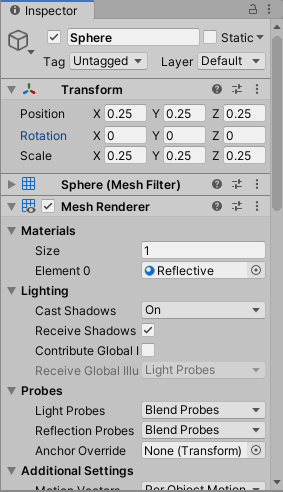
To instantiate this in AR based on the HelloAR controller, create a prefab out of our new ReflectiveSphere GameObject. Simply drag it from the Hierarchy to the Project pane. You can then remove the GameObject from the scene – it should be instantiated during run-time when the user taps on the screen.
As the last step, assign the prefab to the HelloAR Controller, so that it gets instantiated when the user taps on a horizontal plane.
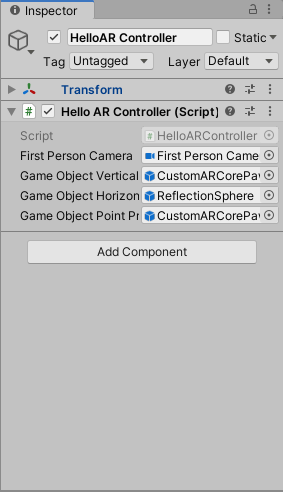
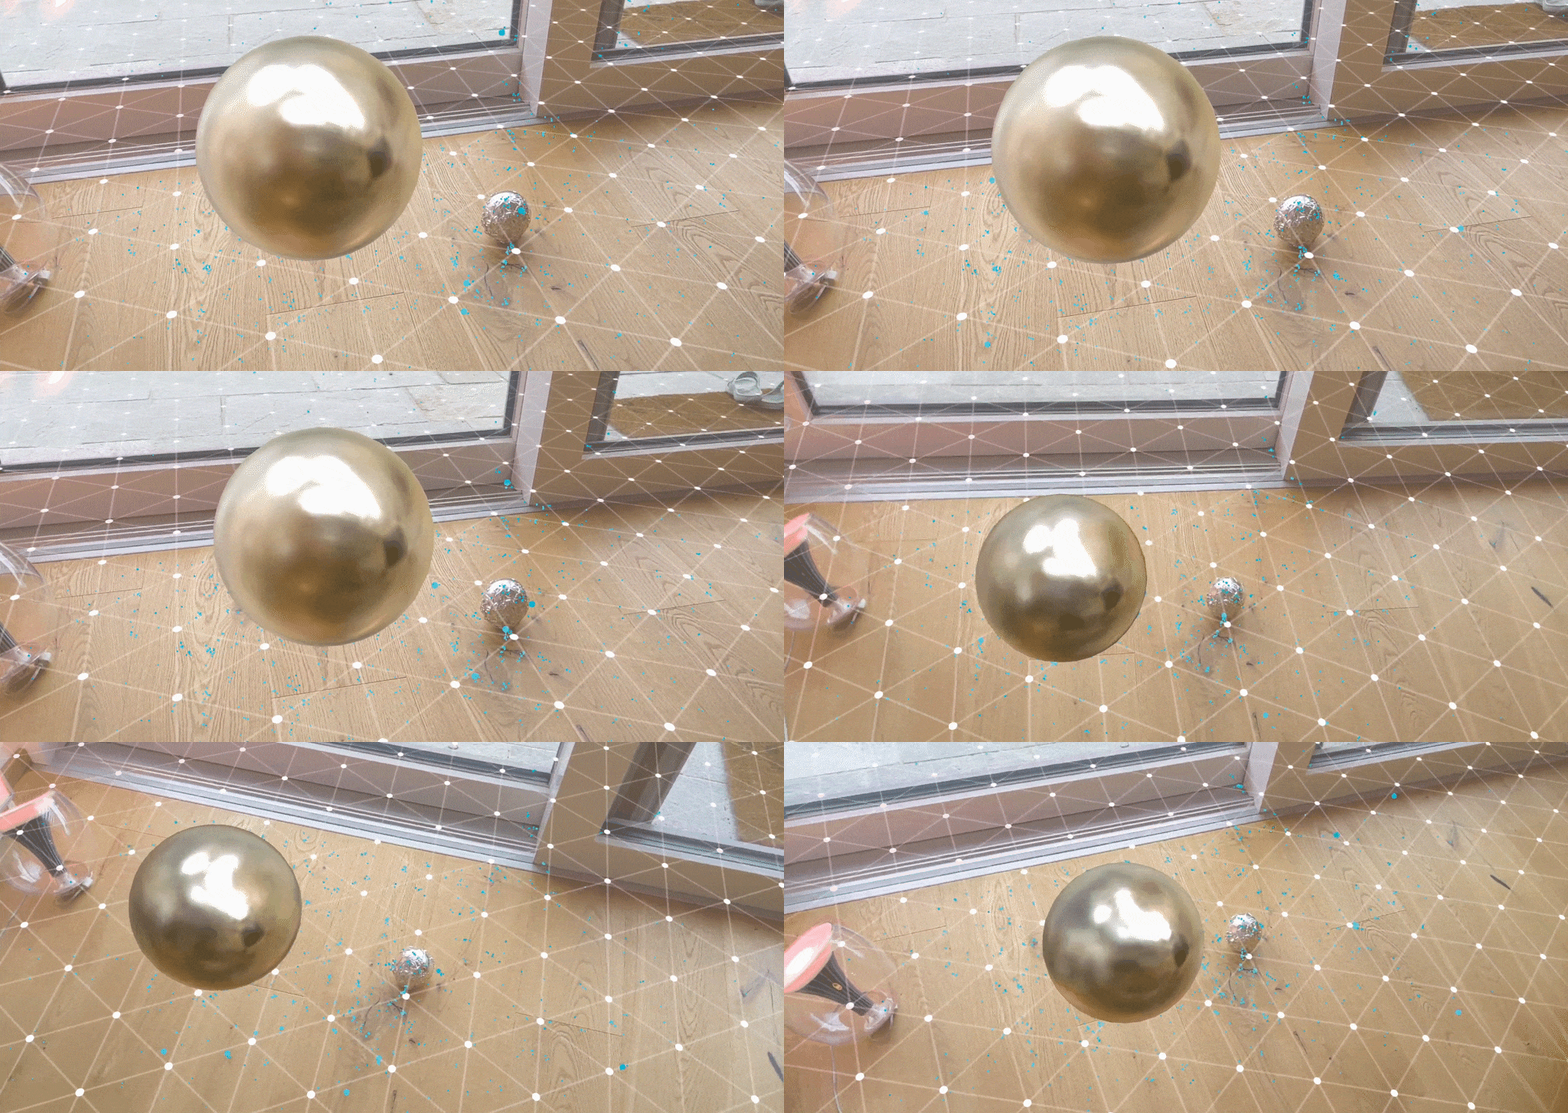
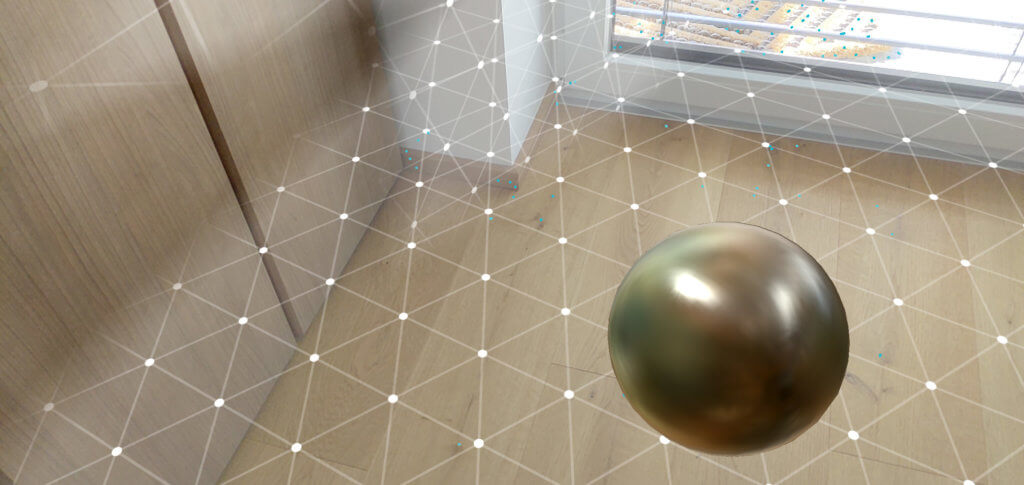
Now, it’s time to test! Run the example on your phone, tap on a horizontal plane and you will see the reflective sphere instantiated at that position in real life. The reflection is of course very blurry. However, it looks great! The overall color and the reflected lights fit very well to what you could expect a real metal ball to look like if it was at this position.
Summary
In this article series, we analyzed what lighting properties are and how we as humans perceive those. Next, we looked at how to perfectly capture the environmental light using reflective spheres and HDR capturing.
As this is not possible in real-world AR use on smartphones, we took a closer look at Google’s approach. They created a neural network that infers an HDR reflection map from a live LDR camera image with an extremely limited field of view.
At the end, I briefly demonstrated the steps how you can create a reflective sphere in a Unity ARCore project, which you can then freely place on surfaces to see how their reflections match your expectations.
Article Series
You just finished the final part of the article series. Here the links back to the previous parts:
