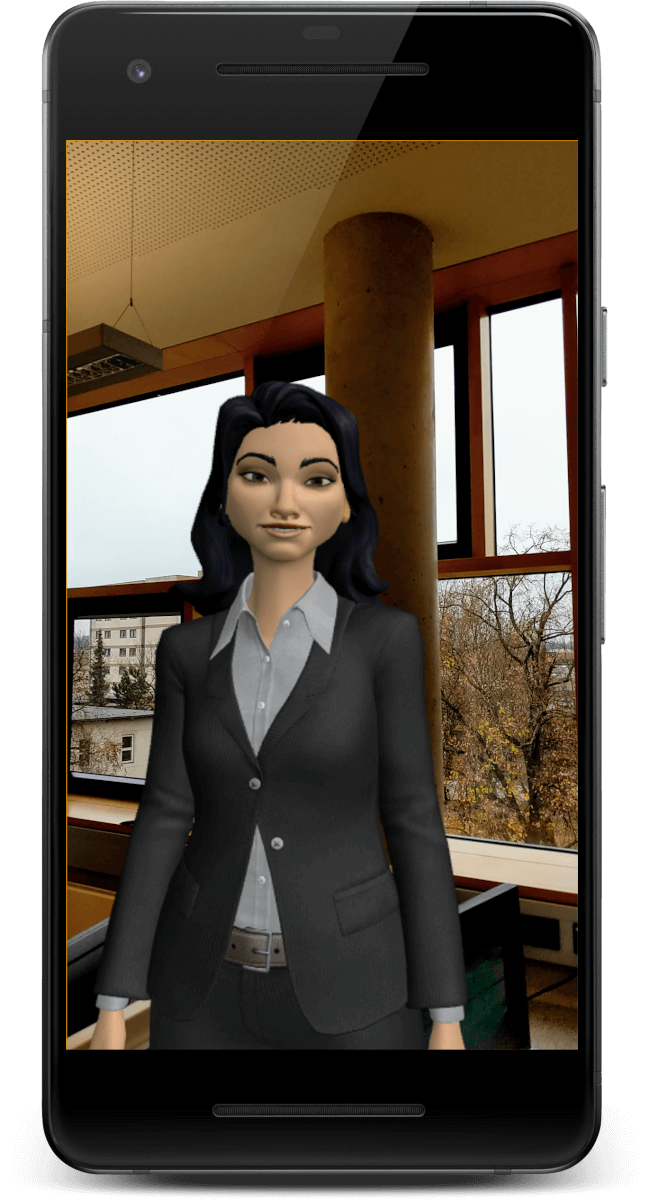
Many AR / VR use cases involve virtual trainings or guide topics. With Amazon Sumerian, you can quickly create cross-platform apps for these scenarios. The main advantage is the large amount of ready-made content: avatars (called hosts) and virtual environment templates. Through the direct integration of Amazon Web Services (AWS), it’s easy to make the host speak to the user – including lip sync, gestures and even conversations through bots.
Of course, you can create similar solutions with Unity. But Sumerian requires far less prior 3D software knowledge and is therefore ideal for smaller projects as well as prototypes. The interface and generic setup is still quite similar to Unity; so it’s a good evolution to switch to Unity – if needed – after you’ve created your first few apps and services with Amazon Sumerian.
Additionally, right now Amazon is hosting an AR / VR challenge with lots of prizes for the best apps of various categories. So, it’s a great time to explore Sumerian!
What is Amazon Sumerian?
Essentially, Sumerian is a browser-based 3D editing platform. It allows developing for most AR and VR platforms, including Oculus, Vive, Windows Mixed Reality, as well as the browser, Google ARCore and Apple ARKit.
Behind the scenes, it’s based on WebXR. That’s the evolution of WebVR, which was mainly targeting VR headsets. With WebXR, you can access sound, controllers and also anchor objects to the real environment in Mixed Reality scenarios.
Amazon Sumerian Account Setup
First, you need to set up your Amazon account. Amazon offers an AWS free tier, which gives you access to many services and provides some usage quotas for free for the first 12 months. Afterwards, you can still continue using selected services for free. Note that Sumerian is not part of these, but 12 months provides enough time to test & develop your service.
For Sumerian, the current free quota in the first year is that your scene can have a maximum of 50 MB and be viewed up to 100 times per month (-> 5 GB / month). According to the Sumerian pricing page, the views are calculated based on traffic – so if your scene is smaller, you can serve more viewers than 100. Still – it’s not much, but enough to get started.
In case you’re a student or educator, you can also sign up for the AWS Educate program. It provides more free credits to use for creating your services. Additionally, you don’t need a credit card.
Amazon Cognito ID
After signing up to AWS, create an Amazon Cognito ID. It’s Amazon’s access control service, which is used to connect Amazon Sumerian to other Amazon services like speech processing.
Amazon provides two templates to make setting up the required stacks for the Cognito ID with a single click:
- Speech component only: Simply click on the “Launch Stack” link for the “Using a Host and Speech Component” tutorial in the table. This already sets up the required permissions.
- Speech & chat bot (Amazon Lex): use the template from the dialogue component tutorial. This template is mostly the same, but sets up an additional policy to run lex bots.
The services are created through AWS CloudFormation. This essentially creates a stack of aligned services that you can then use together from your Sumerian scene through the Cognito ID. CloudFormation is the description language that takes care of the setup.
When setting up a stack, make sure you switch to the correct region in the top right corner. Also, change the default stack name to something you recognize later on.
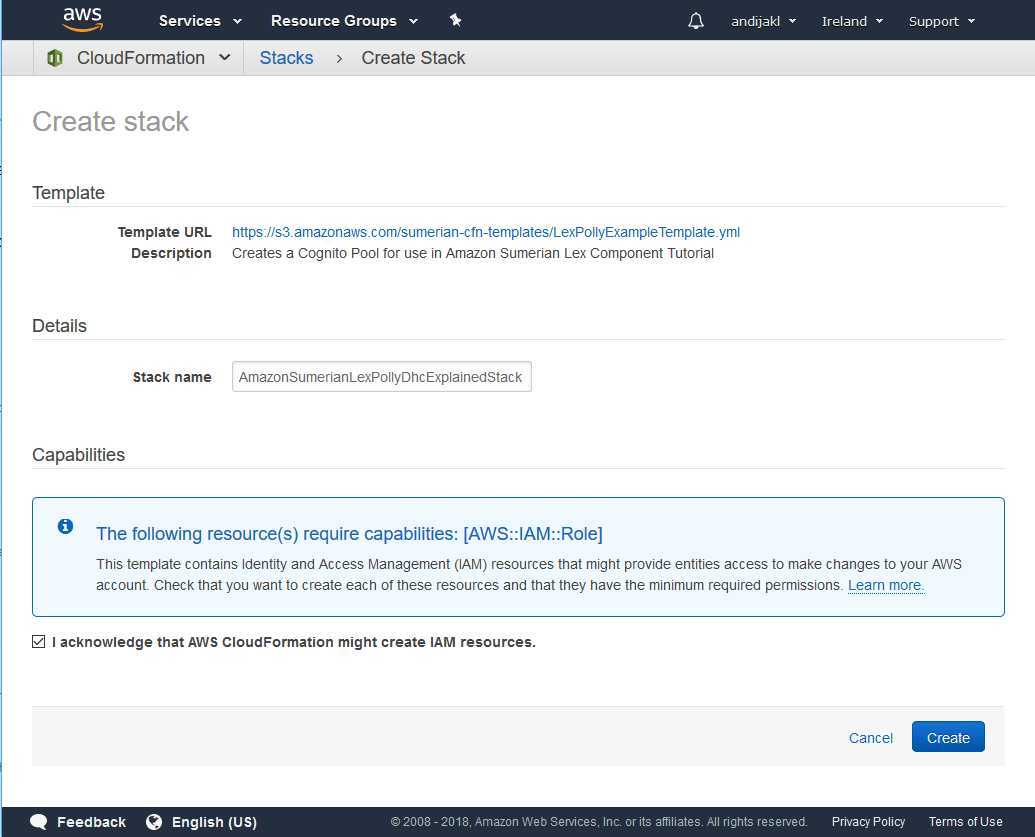
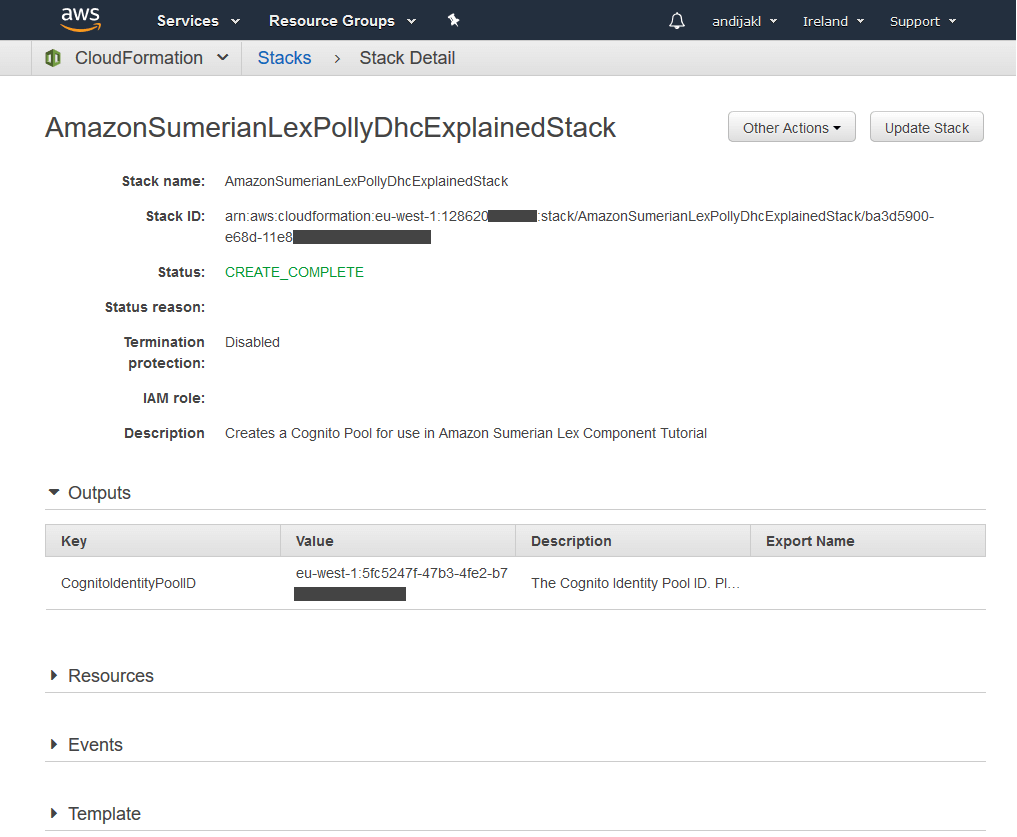
Creating the stack takes a few minutes. Make sure you write down the Cognito ID that you get as a result. You will soon need that in Sumerian. You find the ID in the “Outputs” section after the status changes to the green “CREATE_COMPLETE”.
Sumerian Service Set-Up
After signing up to AWS and setting up Cognito, you’re ready to go. Log in to AWS. Make sure you select a region close to you to create your Sumerian Service. It’s difficult to move your service to a different region later on.
Note that some AWS services are available only in selected regions. Our service will need to communicate with speech services. To keep latency to a minimum, it’s best if the speech service runs in the same region, or at least close by. In Europe, Ireland is currently the most feature-complete region; so I’d recommend creating your service there if you’re based in Europe. Check the list of network locations in the Amazon documentation.
In the Sumerian Dashboard, you can quickly create a new project based on one of the existing templates. In this article, I’ll use the “Augmented Reality” template. It allows easy testing in the browser, and additionally ties in to Google ARCore and Apple ARKit via companion apps and a short script to anchor objects in the real world.
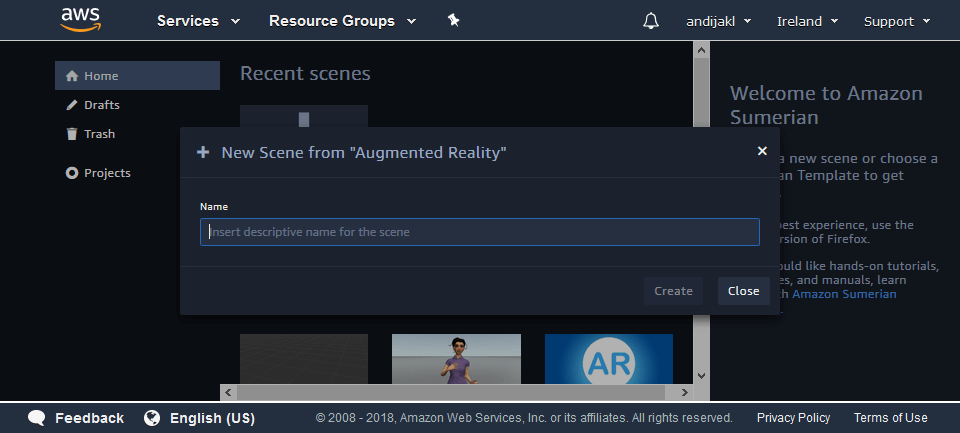
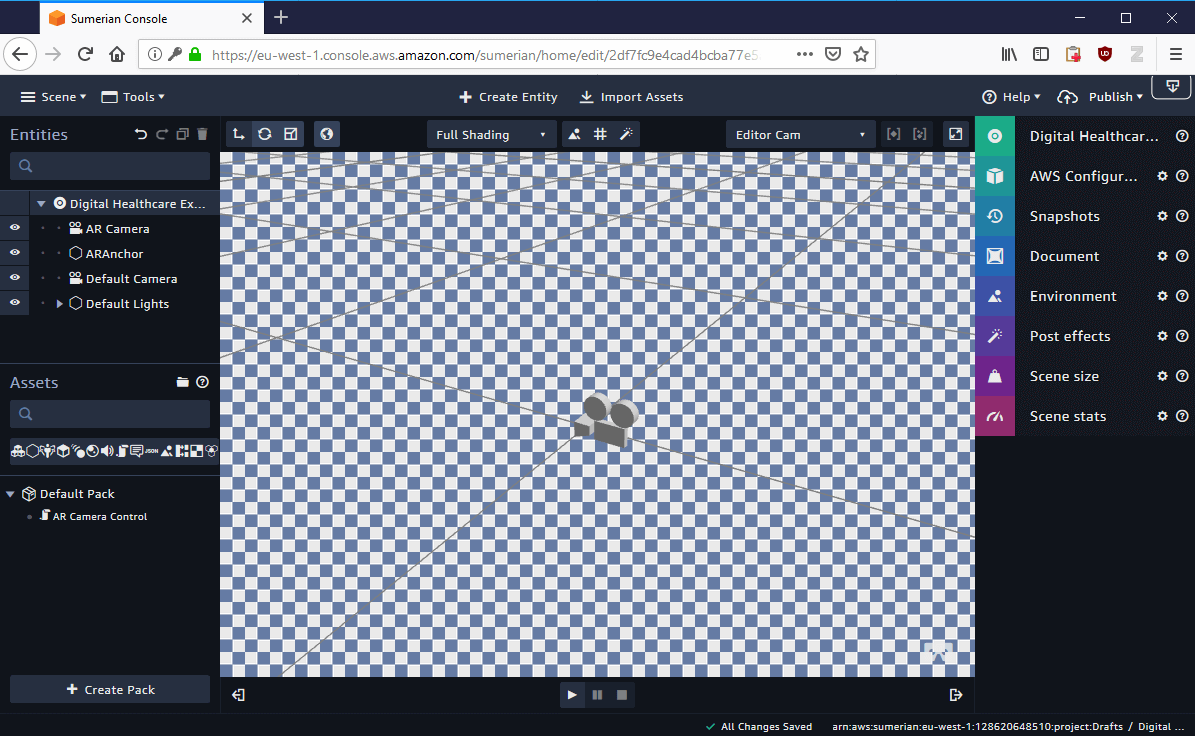
The user interface has a lot of similarities to other 3D authoring software like Unity.
- Canvas / 3D View: visual representation of your current scene. In the Augmented Reality template, you see a rather annoying pattern in the whole scene, which indicates the “see-through” aspect of AR.
- Left mouse button: select objects
- Middle mouse button: move the view (pan) – or shift + left mouse button
- Right mouse button: rotate the view – or alt + left mouse button
- Entities: holds everything in your scene. If you click the top level entity, the inspector panel shows scene-wide settings.
- Assets: all assets currently available in your scene. Not all of these have to be actively used in the “Entities” window. Many assets come in “Packs”, which hold different assets together, like the 3D model and its texture.
- Inspector Panel: properties and settings for the currently selected entity
- Top menu: for managing the scene, creating / importing entities and publishing your app
Augmented Reality Hello World
It’s always a good idea to proceed with a simple test before starting to work on the actual scene.
In the top area, click on “Import Assets”. In the dialog, filter for entities by activating the hexagonal type filter. Among other objects, you will see the virtual characters, called hosts.
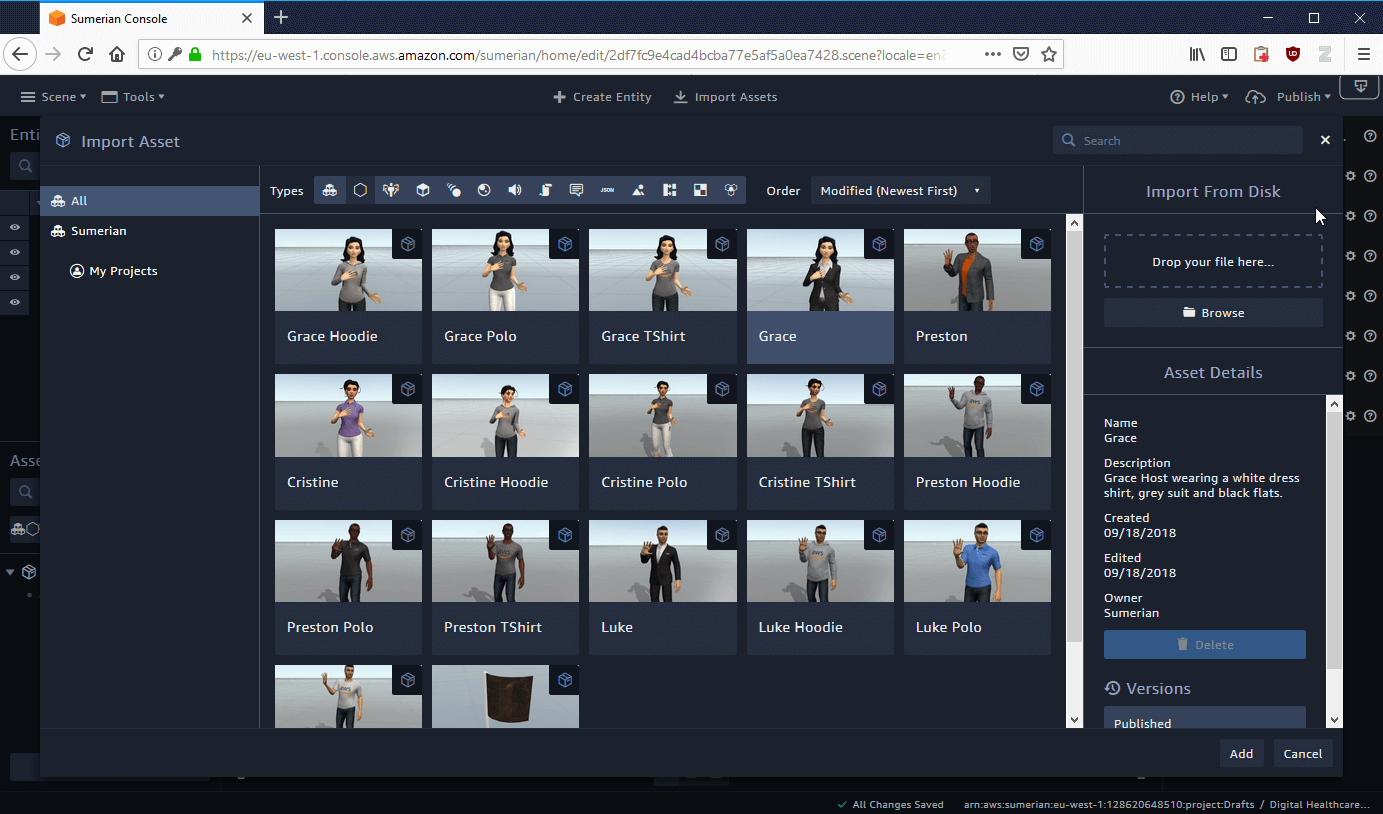
Choose one of the hosts and add the asset to your project. After a few seconds, it’ll appear in the asset bin in the lower left corner. Next, drag the asset to the scene. To drag, use the asset with the hexagon icon. This is the actual 3D object to place in the virtual world.
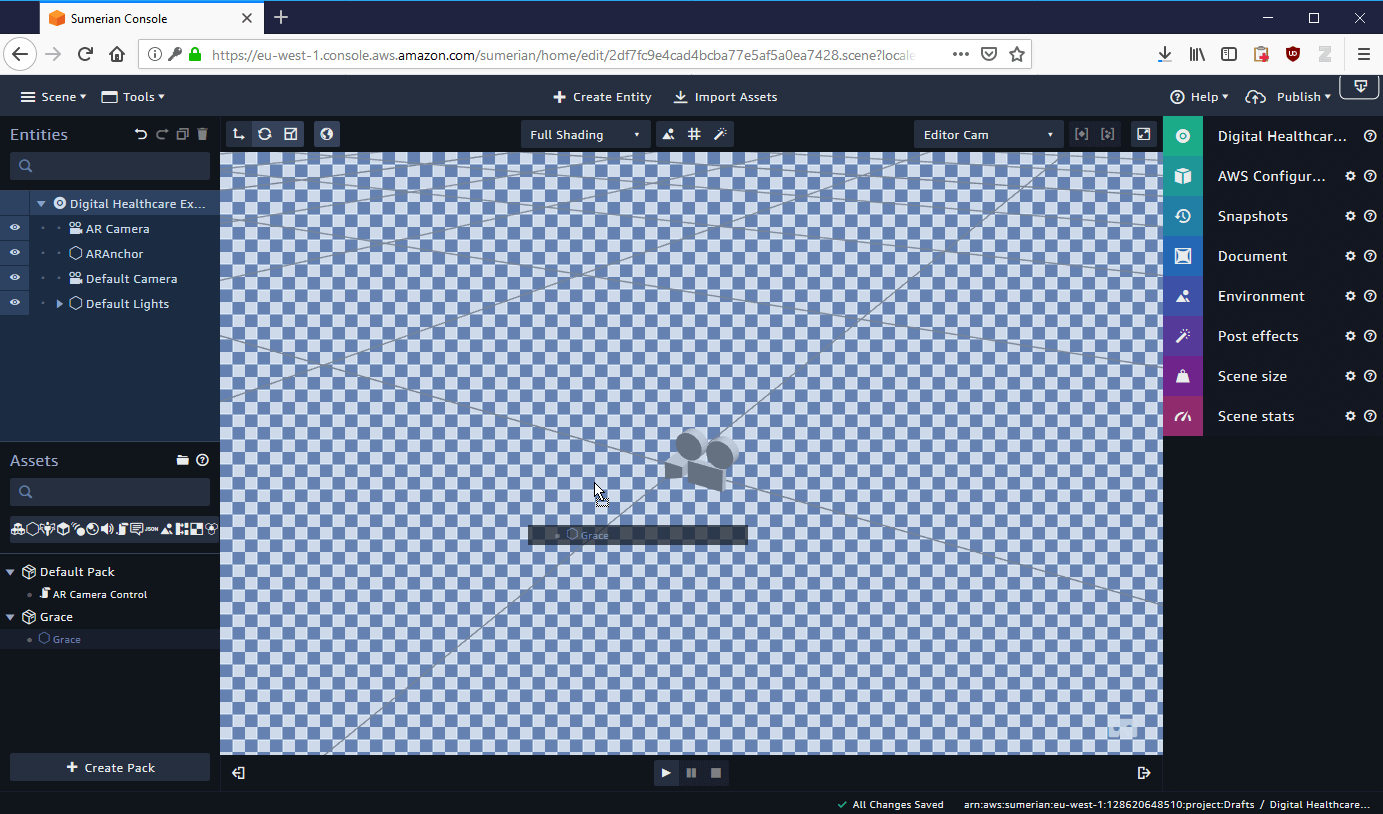
Again, it’ll take a few moments until the asset is fully loaded and appears in the scene.
To center the view of the camera on the full 3D object, press the “F” key on your keyboard while the object is selected. The size of the avatar already matches the real-world size of a human.
Publish your Scene
The next step is to publish your scene. This assigns a unique, public URL to your project, which you can use to test & view the scene outside of the Sumerian editor. The URL isn’t automatically included in any listing – it’s up to you to share the URL with friends and colleagues to test and to showcase your project.
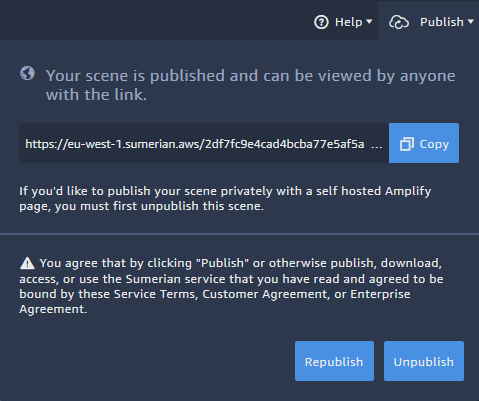
In the top right corner, click on “Publish” > “Create public link”. After accepting a legal notice, your scene will be published within a few seconds. You can copy the link to another browser directory to see if it works.
Whenever you make changes to your scene and want to test again, use the “Republish” functionality. This updates the public version of your scene to match your latest status in the editor.
However, the AR template is a bit difficult to view outside of an Augmented Reality system. The phone’s camera will be tied to the virtual camera. This allows you to physically move around in the virtual world. In the browser view, you currently have no option to move the camera. As the camera is placed at the floor level by default, you’ll see the feet of your character.
To work around this, it’s time to publish the app to your phone.
ARCore / ARKit Sumerian App
Currently, you still need to create a small wrapper app to run your app on the phone. This loads the scene from the web and glues its functionality to the native Augmented Reality API.
The Sumerian documentation contains instructions for both Google ARCore as well as Apple ARKit. Essentially, you just need to update the scene URL in a ready-made sample app template.
The scene data isn’t stored on the phone. The app always fetches the scene data from the Amazon cloud when you start the app.
This makes Sumerian great for prototyping and quick updates. It also means that you only have to compile and deploy the phone app once. After the app is installed, you continue working only in the Sumerian web editor.
Adapting the Augmented Reality App Template
The description in this paragraph focuses on Android. The steps for ARKit are similar. Follow the iOS tutorial for more details.
For ARCore, clone the starter project repository from GitHub. Open the project in Android Studio. You might get a warning about a recommended Android Gradle Plugin update. It’s safe to update the project to the latest versions.
When adding the scene URL to line 49 of MainActivity.java, add an additional string at the end of the URL: “/?arMode=true”. This enables the Augmented Reality mode and uses the phone’s camera stream as scene background. Your URL could look like this:
private static final String SCENE_URL = "https://eu-west-1.sumerian.aws/2df7fc9e4cad4bc[...].scene/?arMode=true";Additionally, you might want to change the title of the app – especially if working on multiple projects and you need to differentiate them on your device.
In your Android Studio project, find the relevant setting in: app > res > values > strings.xml.
Finally, click on the play button to compile and deploy the app to your phone!
Next Steps & Article Overview
In the next part of this article, we’ll explore the basic concepts of Sumerian and start interacting with the host.
Amazon Sumerian article series:
- Amazon Sumerian & Augmented Reality (Part 1)
- Speech & Gestures with Amazon Sumerian (Part 2)
- Custom 3D Models & AR Anchors in Amazon Sumerian (Part 3)
- User Interaction & Messages in Amazon Sumerian (Part 4)
- Animation & Timeline for AR with Amazon Sumerian (Part 5)
- Download, Export or Backup Amazon Sumerian Scenes (Part 6)
